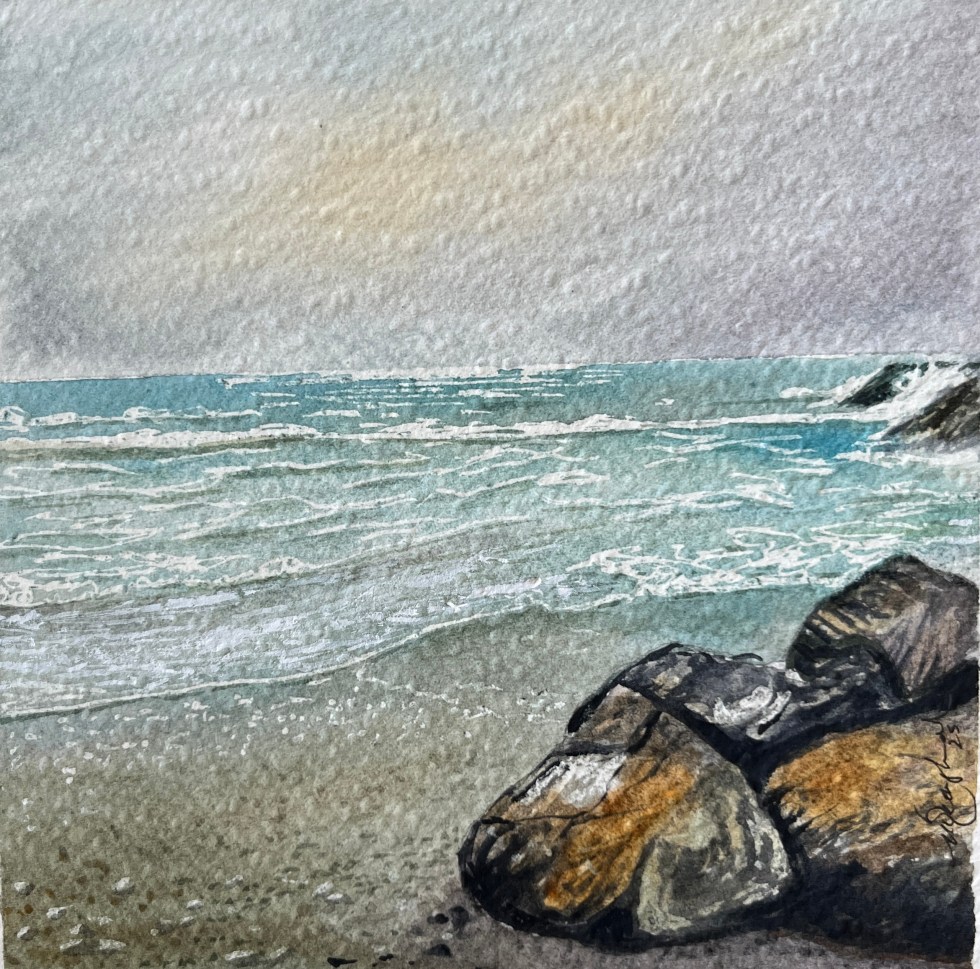
The summer months are busy with exhibitions, it can be tiring. What do you do at the exhibition? If you are viewing, it can be interesting to see the work presented, especially if there are a number of artists showing, and you can chat with the artists (who will be happy to chat to you!), then head off for a coffee.
If you are exhibiting, chatting is good. However, not all chats end up as sales! Also, there are long gaps during the day – no one to chat to, so what do you do.
I don’t read much. I have decided to pass the time painting. A number of positives come out of this – it is a demonstration of your work and the techniques you use, it validates your work and starts great chats. People are genuinely interested. Most of all, remembering the reason we paint at all, it helps to pass the time. I have put a few of these in the space above the blog. Small pieces (watercolour), taking one or two days each (in between chats).
This year in addition to painting at the exhibitions, I have been running a little experiment. I have created a number of ‘sets’ of paintings – same scene – painted in three different mediums, watercolour, acrylic and oil. My findings (not robust enough for publication in an academic journal) are as follows : (I) There is an underlying feeling that oil paintings have more value than other mediums, (ii) when push comes to shove, most people cannot tell the difference between an acrylic painting and an oil painting, and (III) the majority liked the watercolour best. Now, what to make of that?
The ‘old masters’ painted in oil and so it has a pedigree. Acrylic is a relatively new medium. For me, it is cheaper, and easier to use (because it dries quicker) – I prefer it, and my little piece of research shows that the average person (and quite a few artists) cannot tell the difference. So it begs the question……
Some artists will point to the fact that because oil stays ‘wet’ longer its is easier to work and rework, blend and so on. Other ‘benefits’ are also cited. Ok, maybe. Personally, I don’t think you should rework a painting, you should be clear about what you are going to do from the start, then just do it. That’s the the way watercolour artists go about it!
Regarding watercolour, it seems to have become a niche. Galleries and major exhibitions (eg RHA) don’t include watercolours in their exhibitions – I challenge you to prove otherwise. I have been around the country and that is how it is!
Yet – when asked at my exhibition, without prompting, most people chose the watercolour as their favourite painting in the set of three.
So where does the future lie for me. Should I continue to work in the niche, even though opportunities to exhibit are limited? Should I move across to oils or the cheaper (but just as effective acrylic). Should I go with the flow? We’ll see.
Anyway, I will be doing some painting in acrylic over the winter. My daughter has asked me to paint a large piece for her kitchen, it is too big for watercolour…… it will have to be acrylic. I could do it in oils but I can’t see the point of the extra hassle. In fact I will do a few, so that she can have a choice. I will post them up on my website, perhaps in the spring.
In the meantime, enjoy the coming period of transition from summer into autumn, get out and about, feel the fresher morning air in your lungs, glory in the parade of colour that nature has in store for us, and above all be inspired.
June ended and July started with the Lines of the Land exhibition (An Chead Tine) in Kilkenny. I was delighted that my painting – Baunreagh, Winter – was selected. The painting is executed in acrylic, not my usual medium, so this was something of an experiment for me. I was at the opening, and the painting was very well received. This was a great boost for me. The exhibition is full of great art, much of it abstract – the brief mentions ‘abstracting the landscape’ – it is interesting to see how people have responded to this. It is well worth a visit.
Lately I have been painting in acrylic and in oils, just for a change. Always trying to find a new direction, trying to get a different feel.
I have two exhibitions of my own coming up – note for your diary. On the August Bank Holiday weekend, my exhibition at the Gallery in Portumna Castle opens. I will be there myself throughout the weekend. I will have many scenes in watercolour of Lough Derg and its surrounds, some I showed previously and some new ones. I will be also continuing with my experiment – ‘You decide’ where I will present the same scene in watercolour, acrylic and oil. I am interested to hear from visitors which they prefer, and also to see if people can tell the difference between acrylic and oils (I usually can’t), and what kind of perceptions people have about each. The exhibition continues for the whole month of August (2024). The title of the Exhibition is ‘Low Tide and No Tide’.
On 8th of August, Arts Week begins in Kilkenny. I have been exhibiting at the Concert Hall, Thomastown for the past few years, and will be back there again this year. In Thomastown we do our own thing under the TCAF24 banner (Thomastown Creative Arts Festival). A great committee and a great bunch of artists. Im always proud to be part of this. I need to mention AKA also (the Alternative Kilkenny Arts ) without them, the whole Arts Week experience would be dry and meaningless, they bring life to it by creating opportunities for local artists especially, visual, musical and other. Many feel (I do) that the official Arts Weeks has lost its relevance, AKA has stepped in to add a bit of jizz to the proceedings. However, I think there might be changes afoot!
My exhibition is called ‘Low Tide / HighTime” and will feature watercolours only. I am working with the low tide theme this year, I love to paint the coast at low tide especially, because the wet sand is especially interesting, as it is full of colour and reflections. Also, I love the sea.
With both of these exhibitions, when I am in attendance, I will have my haggle box with me. What’s in the box – come and see!
I am chuffed, of course, that my painting (titled ‘Gold Creek’) won first place in an art competition, last month. Thanks to those who put pressure on me to enter, and to all of those in the community that offered their good wishes on my win.
The competition was national, organised by the Active Retirement Association. I was qualified to enter….. The standard was good, mostly oils, and I was pleased that one of the few watercolours won out. I have been wondering lately, if there is a bias against watercolour (out there) so it was a welcome boost.
I am a little concerned, however, that it puts me firmly in the amateur category, whereas I would like to be taken seriously as an artist. Ok I am an amateur, but I put a lot of time and effort into it!
Anyway I am happy to be able, through this win, to promote the value of being active and of expressing yourself through art (of all sorts) when the time comes to finish the nine to five.
I think most people throw a wobbly, when they suddenly realise that the world (office, school, shop) carries on without missing a step, when they make their exit. To be so important and integral to the working of the mechanism one day, and of no relevance the next ….. well, it is difficult to come to grips with it. To have skills, knowledge and contacts in your field, and to have all of this disregarded, and your position goes to someone you feel has much less in their arsenal, and who doesn’t have a proper understanding of the role, the issues, the challenges …… Bang!
That said, Patricia, if you read this, Im sure you’ll do a great job.
The truth is, I believe, that we actually gain greater importance, more relevance when we throw off the yoke of the nine to five. We have such great freedom, if we choose to use it, to follow our dreams and to lead others towards their own dreams. We have more time for loved ones, who are infinitely more important than workmates, and the skills we built over a lifetime, can now be brought into play in pursuit of greater goals, than profit margins and the agendas of people who mistakenly think they are important.
I will be showing the painting during Arts Week (August 8th – 18th, 2024) as part of my exhibition ‘Low Tide/High Time’ in the Concert Hall in Thomastown. Do come along.
My first exhibition of 2024 is a joint exhibition with Ann Brennan at the Gallery in the Coastguard Cultural Centre, in Tramore. The exhibition is called Low Tide / Green Grass. It runs until the end of May. Ann paints in oils, whereas I am exhibiting my watercolours, so there is a mix of styles.
Ann is actually a second cousin of mine. We only became acquainted about ten years ago, we were both working on a family tree project. As it happens Ann had already done a very comprehensive search and produced a little book. I learned that she was an artist. At the time I was beginning to spend more time painting myself, and Ann was a great source of practical help and advice. I am very pleased to be exhibiting with her this month.
Why I moved away from oils and embraced watercolour is another story.
Is there a realm beyond the one we are living in, another dimension? Is there somewhere else we can go, when this world is tiresome, or bothersome? How can we get there, would a medium help us find the way? Art is a great medium to help us escape the realities of the real world. The act of creating a painting can transport us.
The painting itself, when finished and hanging on the wall, can sometimes also transport us to that other realm. If we let it. For me, the most absorbing paintings are paintings of the sea, I always come back to the meditative art of making waves.
Waves are by their nature eternal and infinite. Where, and when does a wave start? A stone cast in the sea will create a ripple and that ripple will travel outwards, and weaken, but never die. It will blend with other ripples and forever be a part of the eternal motion of the ocean. An underwater earthquake may cause a tidal wave, and that too will live forever, and today some of the waves crashing on the beach have been born decades, even millennia ago.
When the wave crashes on the beach, does it die? No. I have watched them for hours. The energy of the wave spills out as spray and foam, rides up the sand, and returns, under the next wave to reach land. It returns to the sea, drawn outwards by the tide, gaining new strength all the time. Where will it go next?
I am painting a series of waves at the moment. I would like to share the process with you.
When painting in watercolour, you need to plan the painting in advance. There is a lot of white to be seen in the ocean, spray and foam. In watercolour the whitest white is the white of the paper itself. We need to use this. So I start with the spray and foam, painting this with masking fluid/drawing gum.
I use a brush for the crests of the waves and the larger blobs of foam the are found just at the foot of the waves. It is important to first prepare the brush (an old one) by covering it in soap. I have a small dish with a small round bar of soap, which I spray, with water and I rub the brush around in this. If you don’t do this the masking fluid will solidify on the brush hairs, ruining them. Once the wire crests and blobs of foam are painted with the masking fluid, we have a wide on white painting, which is ready for colour.
I explained before (March 2024) how I paint the lacy foam on the beach, Now I will deal with the waves themselves. I need to say that, before I apply any any water to the paper or paint, I add a little drop of gum arabic to it. This is a clear liquid supplied in a bottle. FYI watercolour paint is manufactured using this gum to bind the pigments, so what we are doing here is adding a bit more. This has the effect, it appears to me, to unbind the pigment again (a bit) and the colours flow and blend in a much more natural way. I really only use it when painting water, it really does add immensely to the process and the enjoyment. It’s great fun.
And so – to the water. The water closest to the shore reflects the sky more so than the ocean itself. On a dull day it will be grey, but we all like sunny days, when the reflected sky will be cerulean blue. So, I lay a wash of this blue, over the lumpier foam a little further out from the lacy foam, blending it a bit with the darker umber colour of the wet sand, where the two meet.
Normally when painting I start at the top of the sheet (the sky) and work down. With these waves I start at the bottom and work up! As I work up the paper sheet, I have to create the waves themselves, with all their might and power. I need to consider the shape of the waves, but remember, I have already drawn their outline, crests, spray and foam with the masking fluid/gum. Apart from those elements, the crashing waves have a shape like a tube. This is seen best in those internet photos of surfers, speeding along inside this tube. The waves further out have a different shape, a bit like moving mountain ridges.
Now, no two waves are the same! They are liquid and moving. The are fleeting, gone in a moment. They change constantly as they roll in. It is difficult to capture all of this on a two dimensional piece of paper. We can really only create the impression of a wave (and the one beside it and behind it). We must do this with paint.
We have two tools to work with – colour and shadow. Firstly, what colour is a wave? A glass of water is clear, it has no colour. The colour of the sea comes from that which is above it – the sky, and that which is below it. At the shore, there is sand below the sea (and probably rocks, seaweed, and so on). The sand can be a variety of colours, but yellow (tan or light brown) sand will appear green when the blue of the sky is brought into the picture. Dark rocks will produce a turquoise colour. And then there’s the blue of the sky.
In these paintings I am working on at the moment I am using Cerulean blue as the base blue, I start with a wash of this colour. I am using cobalt blue to provide texture, ultramarine for darks, and Prussian blue for very dark darks. Four blues.
As for shadow, waves have shadows. We have to use colour to create these. The wave crests further out to sea, will have a darker blue below them (cobalt blue) closer in these may have a deeper shade of blue. These are straight forward enough. The spray on the crashing waves can have a very dark shadow, the body of the wave can be somewhat (or totally) translucent, and there is a dark shadow again at the base of the wave (though this will be partially hidden because of the lumps of foam on the water).
The crashing waves are quite complex, indeed these are make and break. Mess them up and the whole thing goes in the bin. By starting with light washes and with the help of the loosening features of the gum arabic, I proceed gently with these at first, becoming bolder as the waves takes shape.
I have many photos of waves. They are a useful reminder. I can’t say that I use them as a reference directly, but they can help to put you in the mood, to bring you back to the beach. For the most part, I draw the waves freehand and paint in the blues, as described, by feel. That is to say, I make brush strokes according to what I feel will bring the wave to life.
To develop a feel for waves, you have to immerse yourself in them. Literally, if you wish. I like nothing better than to sit on a rock at the beach and watch the waves roll in. Watch how they crash on the sand, how they creep up to your feet, how they scurry back to the ocean from whence they came. Better still, is to sit on a boat gliding across the water, itself moving with the motion of the waves, at one with the sea. You are part of it. I draw on this feeling, which is by now well settled in my bones, when I am painting waves. The feeling of the sea comes over me and I am calm and excited, all at the one time.
When I finish splashing about in the water in this way, I have the painting to a point where the bulk of the work is done, and I can start the process of finishing it off. I leave it to dry completely. Then there comes the task of removing the masking fluid/gum. This has now been totally painted over, though much of it will be still visible. It will also be feel-able, by running your fingers over the paper you can feel it. It has to be taken off. When removes, it will reveal the pristine white of the paper, it will stand out against the paint, and create the whitewater of the beach.
It can be easy or not to take off. A lot depends on the brand and quality of the paper. I am experimenting with different papers as I create this series of wave paintings, the jury is still out. Your index finger works best. Just rub the stuff off with your finger. I play the banjo, so the tips of my fingers are quite tough. Even so, sometimes they can get a bit sore, so I use an eraser to rub it off. Usually a mixture of both. You will know that you have it all off, because by running your fingers across the paper you will feel any gum that is still there.
We now have a completed painting, except that the white is too white. The finishing stages will deal with that and make the whitewater more natural. Again, feel is the key.
With the gum removed the spray and foam is brilliant white with no texture. So again, we need to bring in the shadows and reflections. The foam is shaped much like bubbles in the bath. Sort of round and lumpy. Being light and lumpy, the shadows in the foam are also light. Typically cerulean blue. I might use some light cobalt blue for a slightly deeper shade.
To indicate bright sun, a tiny bit of lemon yellow on the top of the wave crest, will pay off. While you have the lemon to hand, you might consider if a little shade of green might help make the waves more natural looking. As I said the sand beneath the waves will change the hue, and also bright sun shining through the translucent body of the wave will change the light blue to a light green. A carefully laid wash of lemon yellow will achieve this for you. If the day is not so bright you might need some deeper greens, but feel is all important, and adding greens will change the tone of the painting totally.
Finally We might return to the body of the waves, and the sea beyond the near waves, and add a few careful brush strokes to create a bit more motion in the waves.
I now prop up the painting, where I can see it, and from time I will sit and look at it, sometimes squinting, seeking out the final slight modification That will bring conclusion to the process.
When painting in watercolour, you need to plan the painting in advance. There is a lot of white to be seen in the ocean, spray and foam. In watercolour the whitest white is the white of the paper itself. Regarding the paper itself, I find cold pressed best for what I am working on at the moment. We need to anticipate where we want the white to be, and not put any paint on these areas. We can pencil them in and paint around them. The purist will do this, I have no doubt. However, I find masking fluid a great tool for the purpose. I am painting beach scenes at the moment, so I start on the blank sheet with the spray and foam, painting this with masking fluid/drawing gum.
The Windsor and Newton product, most readily available is white. It’s not easy to see a white line on a white sheet of paper. To use the fluid, pour a little on a tray, don’t leave the bottle open, it will go off. Here’s a tip, when you pour a bit of the fluid on a (disposable) tray to use, mix a little watercolour paint with it. This means that you will see the marks you make on the white paper.
The product by Pebeo is better as it already has a blue tint. They, Pebeo, also have a drawing gum pen which is very useful for thin lines (rigging on a boat for instance). This pen I have found very useful for drawing the very delicate, lace-like, foam that we find on sandy beaches when the wave withdraws.
This is how I draw the lacy foam. I use a brush to paint a thin wavy line, to represent the closest part of the receding wave on the beach. Always dip the brush in soap first, and then wash it off immediately afterwards. The masking fluid is a rubbery gum, and will ruin any brush. It’s also wise to use a cheaper brush for this purpose.
I paint another line a little further back (there may be several). Between these two we find very thin lacy foam. It will be different on different types of beach, it’s not really very noticeable on a stoney beach. On sand, it is intricate and magical. I use a nib pen to draw the lace-like rivulets.
I have spent hours looking at the sea, how it moves, how the waves break and recede back to the ocean. As with anything you notice patterns. I have noticed how the rivulets link in with each other, and how the whole effect resembles a lace tablecloth, but with a less regular pattern.
This part of the process produces a white (or slightly tinted) drawing of all the spray and foam, on a white sheet of paper. It is kind of like a negative. If you angle the paper to the light, you can usually see it better. Creating this can be slow, but it is a good exercise in mindfulness.
Armed with this negative, we can now let loose with the paint. I usually start with the shore. I will use a wet in wet approach, and usually start with a wet wash of raw umber. To this I might add raw sienna, on the drier (closer) part of the beach, and cerulean blue (or cobalt blue) to darken the colour of the wetter sand. I bring the wash over the lace-like foam as well, with a bit more blue as the sand is totally wet here (and so would your feet be if you were standing there). As the paper will be quite wet, it is important to lift the board (to which the paper will have been taped) and allow the paint to move around so that puddles are not formed. This is important always, when painting wet in wet.
When nearly dry, I will let it sit at and angle (up-side down), the darker paint will run downwards (towards to foam), and help to create the faint shadow that we find in front of the foam. I let it dry, and will return to finish it off later.
Once the paint is completely dry, we can peel off the drawing gum/ masking fluid. The pristine white of the paper will be revealed. Use your fingers, if these are sore as a result, use an eraser, or even kitchen paper.
Regarding shadows, I should point out that I live near the south coast. This means that the beaches I paint are south facing, and so the sun is on the horizon. This has only just occurred to me. Accordingly, the foam casts a shadow, in front of it, as the sun is behind it. I think I ought to make it my business to travel, soon, to the north coast, to see how the waves look up there.
Spring is a busy time in the garden, the garden is always my first priority. It is the greatest canvas of all. (Me and Monet, best friends)!
It is also a busy time in the studio. So much to do! I’m taking stock at the moment. My first big exhibition is in Tramore, in May. I have quite a few suitable pieces framed, and a few more unframed, but I have some gaps. The title of the exhibition is Low Tide ,Green Grass, and it is a joint exhibition with Ann Brennan, who is an excellent oil painter. So there will be a mixture of oils and watercolours. Something for everyone. More on this later.
I am expecting a big order of replacement paints and watercolour paper any day now. This is the starting point for the new year. The gaps will be filled. Low tide being the theme, I am planning a series of beach scenes, featuring the Waterford coast. I started working on this theme last year, but I sold two (Annestown and Rathmoylan), during arts week and another (Stradbally) before it was even finished! The Waterford coast is popular.
Also, as I’m just recently back from the sun, I have lots of great photos and memories of turquoise seas and crashing waves. I love painting waves, it’s very close to abstract art, very little drawing is required. Waves on the copper coast, the wild Atlantic way and Tenerife can look remarkably similar, it’s all the same ocean. But in Tenerife, the turquoise was almost luminous. I am looking forward to trying to capture this.
I have exhibitions in August also, I will be working on different themes for these, but I’ll get to that later, first things first.
So here’s to another year, may 2024 be a good one for you.
Possibly the most striking feature of the countryside in winter, is the trees. For most of the year they blend into each other, dressed in their summer colours and blend with the greens of the hedgerows and fields, which is lovely of course. However, to really appreciate the beauty of their form you have to see them naked. In winter they are naked. I find the shape of the deciduous tree in winter, intriguing. I look closely at them, study them. The heavy trunk, branches out in in a random almost distorted way, each branch splitting into smaller ones, which also branch out, almost ad-finitum. Yet, the tree overall, will have an almost perfect spherical shape. This is especially true of the solitary tree.
When painting a tree in winter, the greatest challenge is painting the tiny outermost twigs. Firstly being tiny, they require a very small brush, and because there are so many you need a lot of patience. You can fudge it, of course, and to be fair, in reality, we are only trying to create the illusion of twigs, that’s what art is about. For me though I find it amazing that what appears to be so random in growth becomes so graceful in the fullness of the whole tree. I think a naked tree is a bit like a woman. I’ll let you think about that.
I did a small watercolour last week, trying to capture these trees in the winter landscape. I wasn’t that happy with it, and wanted to try again. I chose to work in acrylics on canvas for the next attempt. This decision was probably influenced by the fact that I have a lots of canvas lying around. Im, not sure if I can easily explain, why, I as a watercolour painter, feel compelled to buy canvas sets any time I see them!
I was also influenced to use acrylic because I wasn’t to sure what I wanted to do, exactly, except that I wanted to take a more abstract approach. Acrylic allows me to work in a different way, a different mode and mindset. Acrylic paint is opaque, so that you can change direction during the painting process. This is something that’s not easy to do with watercolour.
I am trying to determine what makes a good abstract painting. I am always drawn to paint detail. If I can paint less detail but still retain the essence of the thing, that’s the key (maybe). If you go too far you could lose it altogether. I want to spend some time trying to abstract the landscape/seascape. I don’t think this is an easy thing to do.
Anyway, after prepping the canvas, I put on a layer of greeny/blue, which didn’t look too realistic, so I painted again using a lighter more realistic sky blue. Then I laid in a hazy suggestion of distant trees on the horizon, before starting on the bare trees that were to be the main feature. I spent a good deal of time on the trees and the painting was taking shape, but was not very loose or abstract.
The next day, having slept on it, I returned to the canvas. On impulse, I took my pallet knife and started buttering on thick layers of the paint I had been using (burnt umber/raw sienna/ ultramarine). I preserved the greeny/blue already dry, and using the knife created the furrows of a waterlogged ploughed field. The abstraction created itself. The finished product has now elements of realism and abstraction within it. It’s the best I can do for now.
Will I go one step further and abstract the scene further? I don’t know. I think I will leave this one as it is. Maybe tomorrow I’ll start another.
The sea is made of water, obviously. The sky is made of water also, but much less of it. Think about it, if there was no water in the sky, there would be no clouds, no mist or fog, no rainbows. Nothing of interest! Ok we all like a blue sky, but we rarely see one, not here anyway.
Painting the sea (lake/river) and sky in watercolour is a joy. The two are part of the one. The sky is reflected in the water. For me, the best results are when they are painted together – wet in wet.
This painting (Eventide, Portland) was executed in this way. First the drawing (it took a while to get the boats looking right) then I painted the reflection of the hulls with masking fluid, I also painted a few ripples in the water. I then outlined the boats lightly with waterproof ink, so that what would come next, would not smudge them.
For wet in wet to work the paper itself must be fairly wet to start with. This paper was Saunders Waterford 300gsm, and was stretched (I’ll describe this another time) and taped down, so that it would withstand a good deal of wetting. I did not wet the boats.
Then I started to apply the paint. The trick here is to keep the paper damp throughout this stage of the process. The lower part of the evening sky was still fairly bright, I painted this with raw sienna and also its reflection in the water as one, using a large round brush. I used a little crimson towards the upper part of this, and then some blue (cobalt I think) above and below this. All of this was wet and spilling across the page, which I encouraged by lifting the board (and paper) to different angles to get the colours to blend in a natural looking way. I think it is important to keep the paint moving until it dries.
The clouds were a mixture of crimson and blue mixed on the damp paper. I added more of the different colours, and more water where needed, and continued to move the paint around, as described, until I felt I had captured it. I then let it dry completely. (Image 1)
With the sky and water finished, I next turned to the detail. I painted the trees lightly, being careful to leave sky holes (where the light shines through the trees) and again their reflection in the water. I worked darker shades into the trees and some variation in colour (using the same blues and yellows as previously) as the trees got darker the boats got brighter (counterpoint). I removed the masking fluid covering the reflection of the boats themselves. I then worked to get these reflection looking right and added the detail to the boats (canopies etc)
Almost there, but I felt it was all a bit pale, so I mixed a light glaze of cadmium orange and laid it on and I felt it finally all came together. (Image 2).
The painting (A4) was done over two days. I actually continued to tidy up bits and pieces (sky mostly) over the next week or so.
I write this blog every month as a reflection for myself, I hope it was of interest to you. Thanks for reading. Micheal.
Final painting (Slate Quarries)Initial drawing (unfinished)
Draw and paint a cliff in watercolour.
A key element of the coastal landscape is the cliff. They contrast starkly with the sand on the beach and the blue of the sea. We also find them in the mountains and in quarries. I have painted many. How to go about it – to go straight for the paint or to draw them first? I’ve done both, it depends on my humour and it depends on the cliff in question.
To start – a drawing is needed in all cases. At the very least, the shape of the headland needs to be outlined, and the base of the cliff. We also need to draw the horizon and any other features. These can be done lightly. Then we can start to apply the paint.
I usually start with the sky, this brings me down to the top of the headland and to the horizon of the sea and sky. When we paint in watercolour we first lay down the very lightest colours in the scene. Accordingly, I search for the lightest shades in the cliff, and put down a light wash, perhaps raw sienna or raw umber, probably dropping some other shades (red, blue whatever) and let that dry. I might then use a dry brush approach to darken the areas in shadow. Finally I will ‘draw’ the crevices and rocks with a small brush using darker colours (burnt umber/ultramarine). I will have a reference photo, and I will try to keep my image true to this.
There is a nice technique that can be used for rocks. Paint on a thick layer of different (dark) colours and let it dry for a bit. Before it is fully dry, use a piece of a broken (credit) card and scrape off round rock shapes. This works well for rocks in the foreground. However – I don’t use this approach much, as it gives a slightly abstract rendition of the rocks or cliff face. I prefer to draw the rocks and work light to dark as described above.
I am a representational watercolour landscape artist. For me it is important to have the painting as close to reality as possible. I don’t worry about ending up with something that looks more like a photo than a painting. This doesn’t happen. Firstly – I use more than one reference photo, and secondly, I will tend to only have detail in parts but not all of the painting. Also, thanks to the ‘happy accidents’ phenomenon it’s always going to look like a painting.
Sometimes the cliff is not the key part of the scene, but sometimes it is. If the cliff is a recognisable landmark, or the key feature of the scene, then I draw the cliff in great detail.
How do I draw such a cliff. I approach it the same way as I draw anything. I draw what I see.
Some will use a projector, and trace the image on the paper! Many artists use a grid approach, ruling the paper into squares, and doing the same with the reference photo, and then they proceed one square at a time. This approach is widely used, and by many artists that I admire.
I don’t use a grid, I find it tedious, more importantly the grid is difficult to eliminate. Let me explain. The system works well for oils and acrylics (maybe gauche) because these are opaque mediums, the paint covers the pencil marks. Watercolour doesn’t. It is important to erase all superfluous or unwanted pencil marks before applying watercolour paint. If you paint a watercolour wash over a pencil line you will not be able to erase it afterwards. You don’t want the grid to show through your painting.
I draw what I see, but I do need some tools to get the shapes and perspective right. My paintings represent places I have been and liked. I take photographs and do some sketching at the scene, and the work starts shortly afterwards in the studio. I generally crop the chosen photo on my laptop or iPad, so that the composition is as I want it. Having decided on the paper size (A4, A3 etc) I measure the size of the reference photo relative to the sheet of paper. I can contrive it to be an easy ratio to work with, by adjusting the size of the image. My laptop screen is about A4 size, if the paper is A3 then the image needs to be twice as big on the paper, as on the screen. It can be worked out for any size of paper.
I then look for the key points of the image. The highest point on the headland, it might be 12cm from the side of the reference and 6cm from the top. That translates to 24 and 12 on the A3 paper. I mark that point on the paper (using a ruler). And so I continue. I mark the location of the bottom of the cliff, boulders, the sea horizon, any offshore rocks etc. Using my eye I ‘join the dots’ (very lightly) and go through a process of reviewing and erasing until the scene matches the reference. I take care to ensure that any man-made objects (boathouse/pier etc) are correct in their proportions and position.
Now the question arises – how much detail is needed in the drawing. If the focal point is a person walking a dog on the beach or if the cliff is in the distance, detail is not really required. If the cliff itself is the focal point then I do a detailed pencil drawing of the cliff. I draw the cliff in great detail in pencil first. I draw every crevice, boulder, overhang – I create a pencil drawing that would make the cliff recognisable to the viewer. I generally do this by eye, I already have the outline and key shapes. My iPad has a touch screen, this is a great asset as it allows me to zoom in to view the detail more closely, and zoom back out again, easily.
At this point, sometimes, I will draw over the pencil with ink, especially any areas that will are very dark. I may then erase all the pencil, or I might not. Then I lay down the light wash, then shadows and finally go in over the pencil lines with a fine brush to paint in the detail. The paper makes a difference, ‘rough’ paper, nice for painting on, is difficult to draw detail on.
So, there you have it. I believe that drawing is very important in any kind of art. I was amazed to see Van Gogh’s early work – he was a great draughtsman, and again in Barcelona, Picasso’s early work amazed me. These guys, renowned for loose and abstract work, were well able to draw. Great guys!